Step by step instruction on connecting your iPhone to your cPanel Email.
1. Access the settings of the iPhone that you want to configure.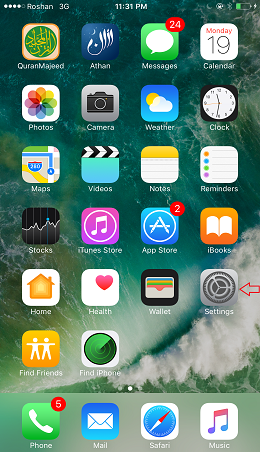
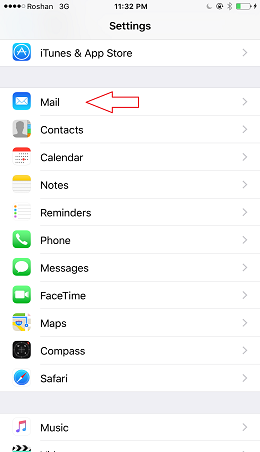
2. With in the settings you will select Mail
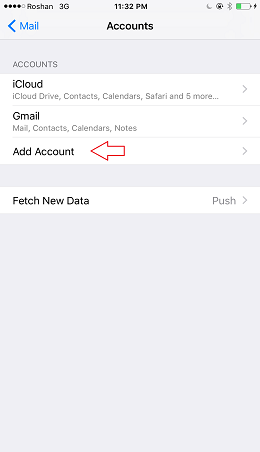
3. In Mail you will select Add Account…
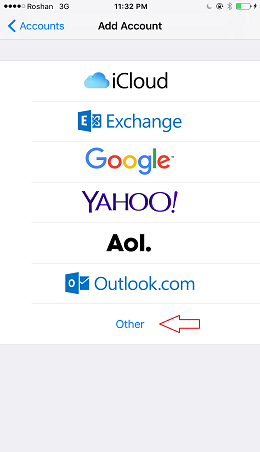
4. On your iphone scroll down and select other. This is recommended to configure your email that is associated to your cpanel.
5. Here you will select Add mail Account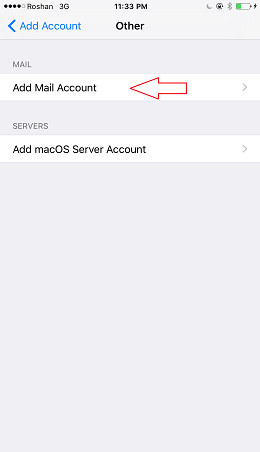
6. On New Account you will enter your name, full email address, password and description (optional) then click next.
(Note: Replace test@acloudv.status.aryanict.net to your email)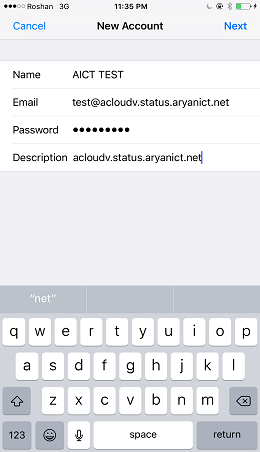
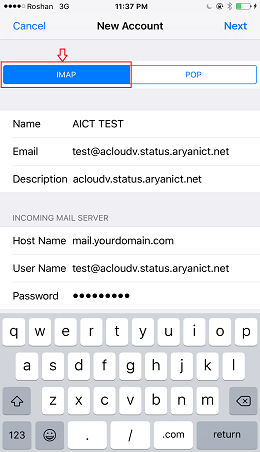
7. This section will look like the previous. You will want to select IMAP as with most mobile devices.
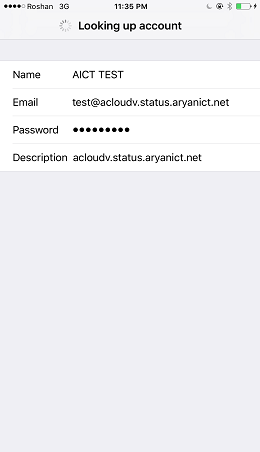
8. After entering your information and click next you may get a notice saying “Can not verify the Sender identity”. You will want to select Continue in order to configure your email properly.
(Note: Replace test@acloudv.status.aryanict.net to your email)

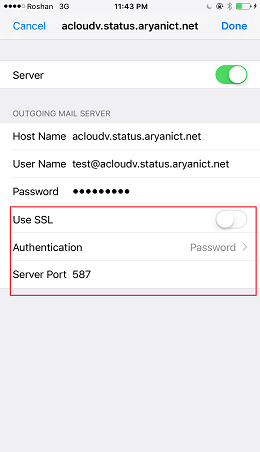
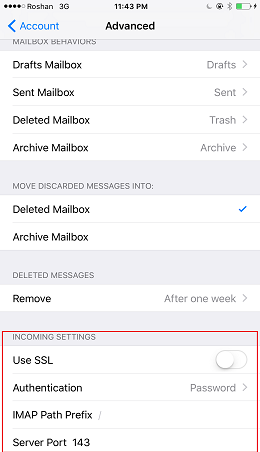
9. When configuring your email, you will want to make sure you have the following information ready:
Host Name: (mail.yourdomain.com)
User name: (full email address)
Password: associated to mailbox
You will place this information in the incoming and outgoing (username and password is optional for outgoing, however is recommended to input the information.)
(Note: Replace test@acloudv.status.aryanict.net to your email)
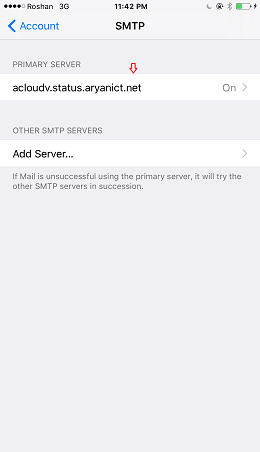
(Now go back to Settings -> Mail -> Accounts -> Select the account and follow below:

(Note: Replace test@acloudv.status.aryanict.net to your email)
(Note: Replace test@acloudv.status.aryanict.net to your email)
10. After entering your information click next there will be a message “This account may not be able to send or receive emails. Are you sure you want to save?” Once you click save and save again. Congratulations your email is configured and ready for testing.
